WordPress Contact Form Entries to Google Sheet

WordPress Contact Form Entries to Google Sheet

Whether you have a simple blog or a business website, the “contact us” page is compulsory. And, there are dozens of Contact Form plugins available, when it comes to WordPress.

In this post, I will be explaining how you can store the Contact Form entries in a Google Sheet using a plugin like CF7, WPForms, Gravity Forms, Ninja Forms.

If you are using Elegant themes (Divi) or Avada theme and created your forms through DIVI Contact Form Module or AVADA Forms or Elementor Forms then also solution to send Entries to Google Sheet is available

DIVI Forms Google Sheet Connector
AVADA Forms Google Sheet Connector
Elementor Forms Google Sheet Connector

Also, If you are having an eCommerce store and using WooCommerce or Easy Digital Downloads then you can use the following

WooCommerce Google Sheet Connector
You can Download the Free version

Easy Digital Downloads Google Sheet Connector
You can Download the Free version

Contact Forms using Google Sheet Connector Features

Free Version PRO version
One-Click Authentication (Secure) One-Click Authentication (Secure) + Custom API Integration
Creating Sheet Manually from Google Sheets (sheets.google.com) Creating Sheet Automatically from Plugin Settings
Enter Sheet Details Manually (SheetName, SheetID, TabName, TabID) Selecting the Sheet Directly from Dropdown for easy configuration
Manual Adding Headers in Sheet Column Automate Headers based on selection
Manual Special mail tags, smart tags, merge tags Automate Special Mail tags, smart tags, and merge tags as per the selection
WordPress.org Support

(https://profiles.wordpress.org/westerndeal/#content-plugins)

Click to Sync Entries available for WPForms, Gravity Forms, Ninja Forms, Avada Forms, Divi Contact Forms.
  Freeze Header along with Header Colors and odd/even rows colors
  Refer to More Features based on the Contact forms you are using
  Priority Support


We hope this article helped you to know about connecting WordPress Contact Form Entries to Google Sheet

If you liked this article, then please subscribe to our YouTube Channel for WordPress video tutorials. You can also find us on Twitter and Facebook

Save New WooCommerce Orders to Google Sheets

Save New WooCommerce Orders to Google Sheets

WooCommerce Google Sheet Connector is a powerful, flexible, and best connector plugin, a bridge between WooCommerce and Google Sheet. GSheetConnector For the WooCommerce plugin sync with your WooCommerce Orders, Products, Customers, Coupons, and Events to a single Google Spreadsheet.

To setup you need:


Installation of WooCommerce Google Sheet

Installing of WooCommerce Google Sheet Addon is simple like other plugins, After Installing the plugin, it requires to authenticate with Google, which is safe and secure.

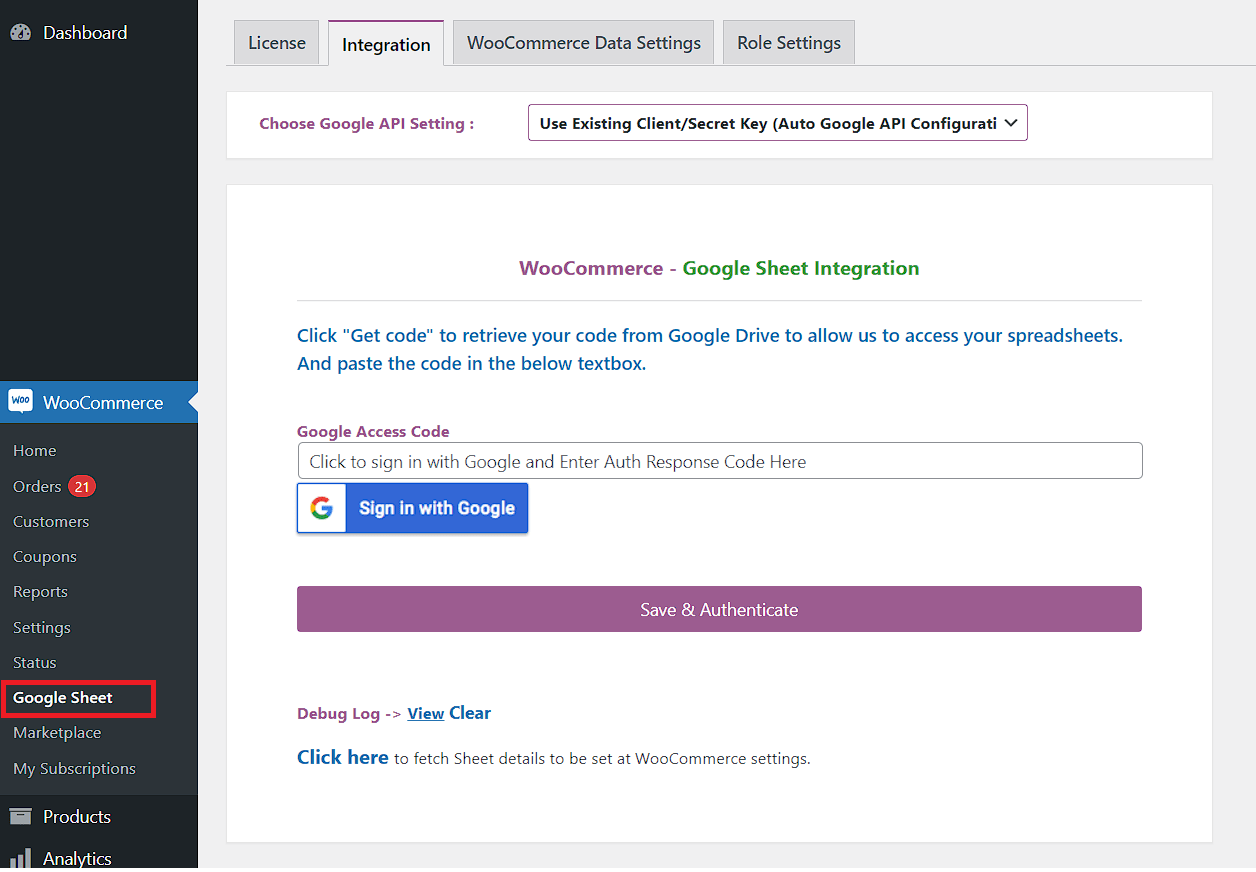
Navigate to WooCommerce  ⇒  Google Sheet  → Integration Tab

You will see two methods to connect with Google, For quick connection use (Auto Google API Configuration)

Save New WooCommerce Orders to Google Sheets | WesternDeal Web Solution | One-Stop Solution Provider for WordPress | E-Commerce


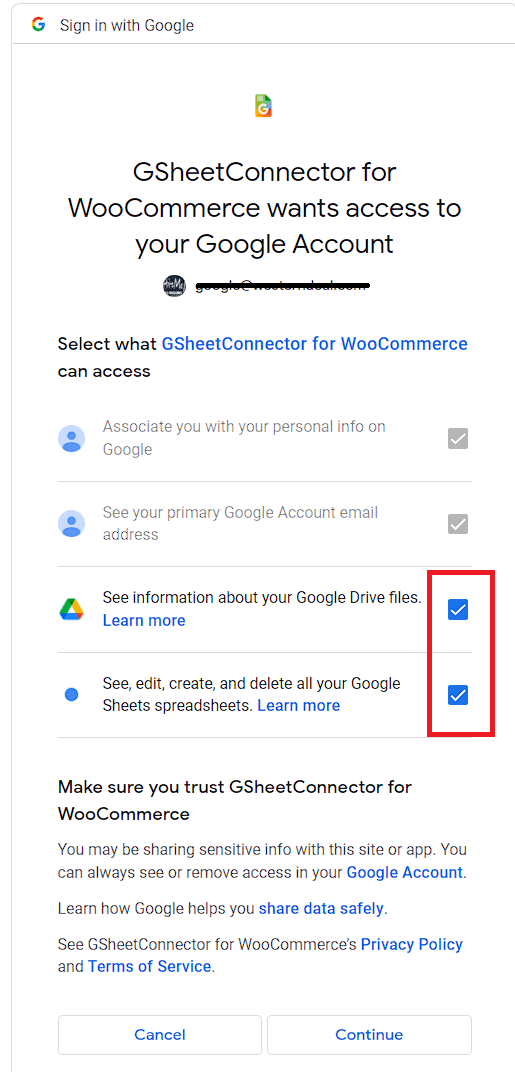
Click on Sign in with Google to get the Auth Code, It requires enabling the Permissions of Google Drive and Google Sheets Manually.
You must have to allow the permissions, then only orders will be sent to google sheets, without permission it will not work.

Save New WooCommerce Orders to Google Sheets | WesternDeal Web Solution | One-Stop Solution Provider for WordPress | E-Commerce

Once you click on Continue, you will get a code, copy the code and paste in the box and click on Save & Authenticate

Once you Save, it will reload and show you a connected email account, and you are done with the google integration.

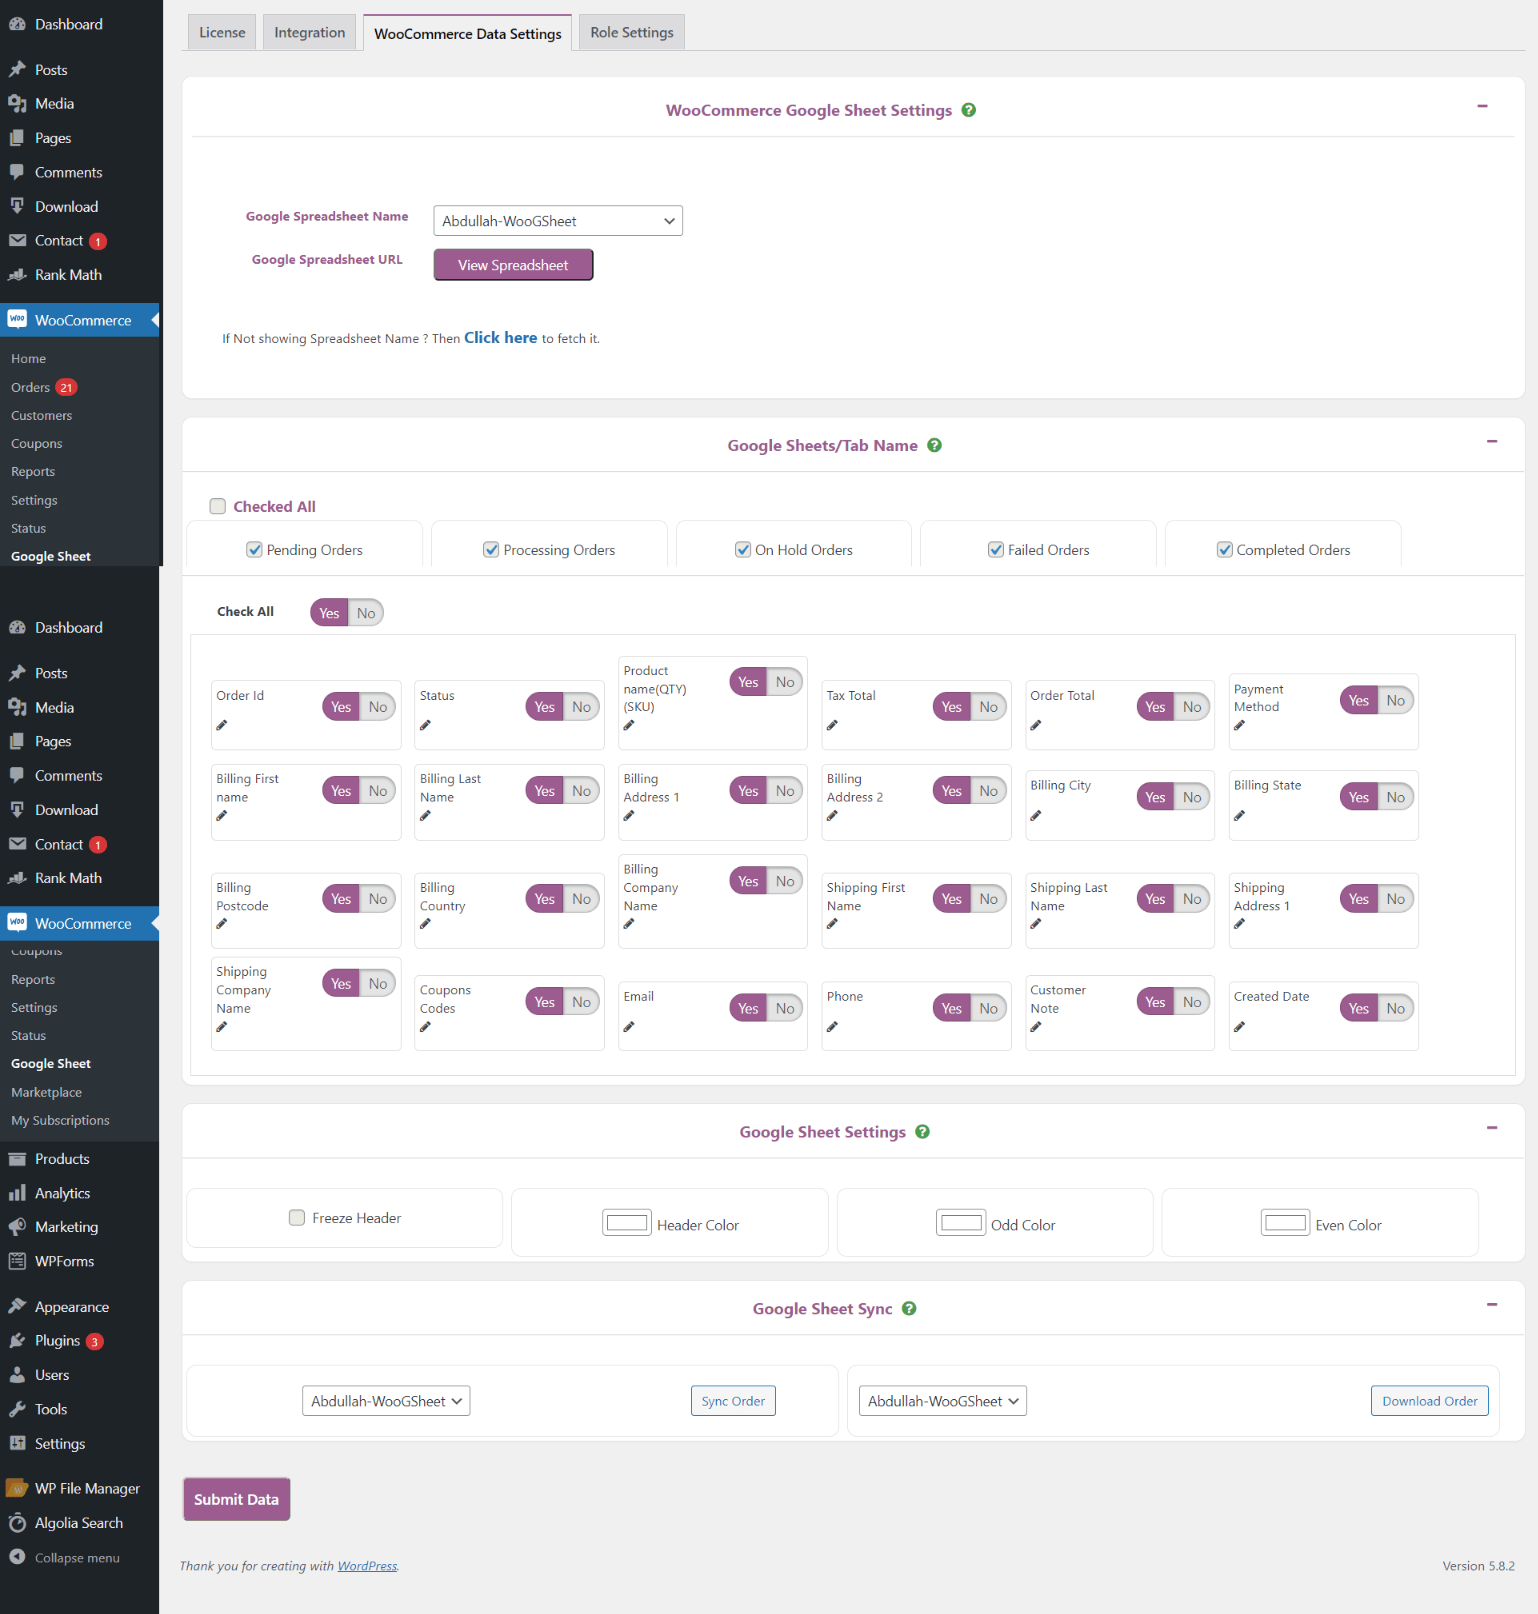
Then Navigate to WooCommerce  ⇒  Google Sheet  → Integration Tab to configure.

Select the Spreadsheet, Select the Sheet Names below and you are done.

WooCommerce Google Sheet Settings

Now Whenever you get a new order in real-time, the order details will be sent to google sheet.

Benefits of WooCommerce Google Sheet Connector PRO version

  • You’ll get the Click here to fetch button to get all the past records.
  • More Sheets will be created, like All Orders to get all the Status details in one sheet, which can be sortable easily.
  • Freeze Header which helps to scroll the large sheets easily
  • Various Header Color Options
  • Various Odd/Even Color Options
  • Sync Order and Download Order Options
  • Compatible with multisite and multi-language sites.
  • Compatible with various addons.
  • and many more.

If you have any queries then reach the developer at helpdesk@gsheetconnector.com

Hope you like the article, feel free to give comments below. Thanks

Ecwid E-commerce Shopping Cart

Ecwid E-commerce Shopping Cart


Ecwid is a widely used Ecommerce plugin. This plugin is very much compatible with online marketing such as Facebook, Instagram, etc. this plugin will automatically synchronize your products and other details such as customers, orders and inventory between your WordPress and Facebook Storefronts.

Let’s learn more about this plugin. Starting with Installation.

Installation:

You can install this plugin from WordPress.org or directly from your WordPress site from plugin menu. After Installation your site will redirect to setup page of this plugin.


Ecwid E-commerce Shopping Cart | WesternDeal Web Solution | One-Stop Solution Provider for WordPress | E-Commerce

Set-up backend Store:

First of all, you need to create your store. If you already have created your store somewhere you can directly connect your store to this site. To make changes in your store, here you can create and update your store.

After selecting on create Store, your store will automatically create. You can make changes as per your requirement after that.

After that, your page will redirect to dashboard of this plugin. Here you can add product, verify geo setting, set up shipping or pick up and get paid, that means here you can specify all your setting relate to your shop including shipping method and payment method.

After making all the setting you will see Store Setup Complete 100%.

Ecwid E-commerce Shopping Cart | WesternDeal Web Solution | One-Stop Solution Provider for WordPress | E-Commerce

Frontend Store:

After making all the changes go to your frontend store to view your store. Here you can see all the products you have entered.

Select one of them to proceed for shopping and click on Add to Bag. After that select for checkout. Continue process further and add your email id and address for proceeding further. At the end of the process, you will see a button named Place order. Select on that to place your order.

Ecwid E-commerce Shopping Cart | WesternDeal Web Solution | One-Stop Solution Provider for WordPress | E-Commerce

After that, you will receive a confirmation page. As we have selected pick up option for selling our product you will see a page where order shown as pending pickup. Also with this, there is another button for Continue Shopping. If you want to continue your shopping.

Here you can set your payment options.

Ecwid E-commerce Shopping Cart | WesternDeal Web Solution | One-Stop Solution Provider for WordPress | E-Commerce
WP EasyCart

WP EasyCart

WP EasyCart

This is an e-commerce plugin. As per its name, it’s actually easy to use. There are in-built product gallery given. Let’s learn more about this plugin.

Installation

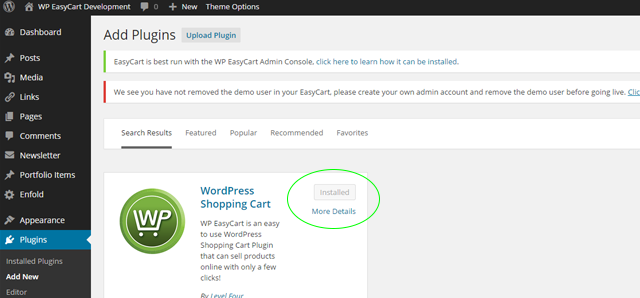
Let’s start with install this plugin. To install this plugin you can go through download that plugin and after that install in your site or directly you can install and activate from Add new plugin menu from your site.

Basic setup

Let’s start with a basic set-up. After activation of this plugin, your page will redirect to the basic set-up of this plugin. Here you can make changes as per your requirements.


WP EasyCart | WesternDeal Web Solution | One-Stop Solution Provider for WordPress | E-Commerce

Add Product

As Mention above this plugin has an in-built product show-case, one should not have to add a new product. Instead of that, you can edit those products. Also, you can Add new product if you need it.

WP EasyCart | WesternDeal Web Solution | One-Stop Solution Provider for WordPress | E-Commerce

Shopping

Let’s make shopping. Go to store page and select one of your product to purchase. Now select Add to cart button to add your product to cart. Here, in addition, you can make a color selection for your product too. After that, you can still continue shopping or go for checkout.

WP EasyCart | WesternDeal Web Solution | One-Stop Solution Provider for WordPress | E-Commerce

Add your shipping address and click on Check Out.

WP EasyCart | WesternDeal Web Solution | One-Stop Solution Provider for WordPress | E-Commerce

Add shipping information as per your requirement and proceed further for checkout.

WP EasyCart | WesternDeal Web Solution | One-Stop Solution Provider for WordPress | E-Commerce

As we are paying manually there is a message shown there that we are choosing a manual payment method. In a live site, you can set your payment method. And after that place order.

WP EasyCart | WesternDeal Web Solution | One-Stop Solution Provider for WordPress | E-Commerce

It’s done. As mention above it’s a too easy and more reliable plugin to your site and shop.

Personalized Product Option Manager (PPOM)

Personalized Product Option Manager (PPOM)

PPOM is addon of WooCommerce. It refers to Personalize Product Option Manager. To personalize your product this plugin is best. Let’s start with Installation.

Installation

Download Plugin from https://wordpress.org/plugins/woocommerce-product-addon/. Add this plugin to your site and activate after installation.

After activation, you will see a submenu called PPOM field under WooCommerce menu. Go to that menu and make settings as per your requirement of your product. Make personalization according to your product.


Personalized Product Option Manager (PPOM) | WesternDeal Web Solution | One-Stop Solution Provider for WordPress | E-Commerce

Add Product

Now add a product under Add Product menu. Here make a change under Product Data. Here you will see a PPOM Field, select the field as per your product’s requirement.  After that publish or update the product.

Personalized Product Option Manager (PPOM) | WesternDeal Web Solution | One-Stop Solution Provider for WordPress | E-Commerce

View Product

Now go to view product. Here you can see PPOM condition field with their appropriate amount.

Personalized Product Option Manager (PPOM) | WesternDeal Web Solution | One-Stop Solution Provider for WordPress | E-Commerce

Now select as per your requirement and select Add To Cart. After that view cart and make payment.

Personalized Product Option Manager (PPOM) | WesternDeal Web Solution | One-Stop Solution Provider for WordPress | E-Commerce

Using this add-on plugin WooCommerce becomes easier and more useful.

WP – eCommerce

WP – eCommerce

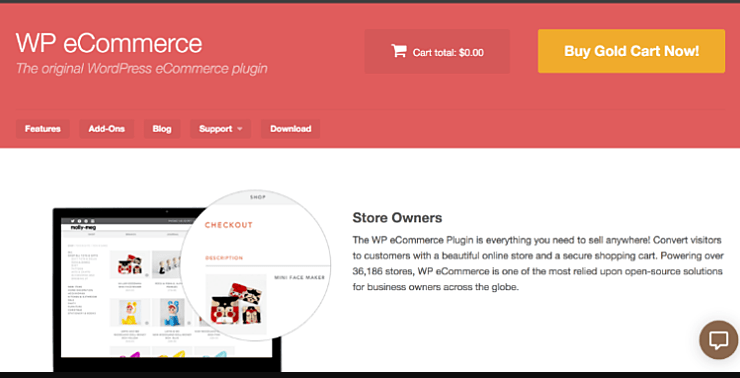
Here we are going to learn about a new plugin: WP – eCommerce. This is an E-Commerce Plugin.

Let’s Start with Installation.

Installation:

Install Plugin from https://wordpress.org/plugins/wp-e-commerce/#installation. After installation, go to your site and activates a plugin from the Plugin menu.

After activation, one must set all settings. For that Go to Store from setting menu. Here you can set all the changes which you need on your website. Such as payment methods and many more.


WP – eCommerce | WesternDeal Web Solution | One-Stop Solution Provider for WordPress | E-Commerce

Add Product:

To add a Product go to Add New Product from Product Menu. Here you can add your product specification such as price, discount, feature image and many more. You can add as many products as you want.

WP – eCommerce | WesternDeal Web Solution | One-Stop Solution Provider for WordPress | E-Commerce

You can see Product page. Here you can see all the products of your website.

WP – eCommerce | WesternDeal Web Solution | One-Stop Solution Provider for WordPress | E-Commerce

Purchase a Product:

To purchase a product click on Add to cart. After that, you will have a link for checkout. Click on that for checkout and make payment. Here we are testing so we will not have many options for payment. In this checkout page, you can add product quantity also. Give your address for shipment here.

WP – eCommerce | WesternDeal Web Solution | One-Stop Solution Provider for WordPress | E-Commerce

After payment, you will have a purchase history page on your screen.

WP – eCommerce | WesternDeal Web Solution | One-Stop Solution Provider for WordPress | E-Commerce

That’s It. Go for it. Download and use this simple E-Commerce plugin for your website.